In this tutorial we are going to talk about TPoints, TPointArrays and ATPAs (Array of TPointArrays).
First of all, what is a TPoint?
TPoint is a point with a coordinate X and a coordinate Y.
It’s record looks like this:
type
  TPoint = record
    X: Int32;
    Y: Int32;
  end;
TPoints can be set in 2 ways:
var
  P: TPoint;
begin
  P := [100, 50];
  //or
  P := Point(100, 50);
end;
This will give our P TPoint an X of 100 and Y of 50.
An example of something you can do with a TPoint is moving your mouse:
var
  P: TPoint;
begin
  P := [100, 50];
  Mouse.Move(P);
  //or if you want to click:
  Mouse.Click(P, MOUSE_LEFT);
end;
TPoints are just a coordinate of X and Y value and they can be relative to anything. If they are relative to your client it’s usually to interact or gather information at that coordinate in the client, however, they can also be relative to an image/bitmap. This is what happens in RSWalker. While using Simba and SRL this will be the 2 main use of TPoints:
- Client coordinates.
- Bitmap coordinates (RSWalker for example).
You can also use TPoints for anything that uses an X and a Y coordinate (or anything that uses 2 ints but if it’s not a coordinate it might get confusing to use).
Now let’s briefly talk about TPointArrays.
By now you should already know what an array is, if not I recommend you check the arrays tutorial!
Anyway… TPAs (short for TPointArray) consist of several points. This points can be close together or far away from each other.
Depending on what you are doing, if this TPoints are relative to the client, you can easily debug them with Debug(TPA).
A common use case for TPAs is to use them with SRL.FindColors():
var
  TPA: TPointArray;
begin
  SRL.FindColors(TPA, RS_ITEM_BORDER, Inventory.Bounds);
  Debug(TPA);
end;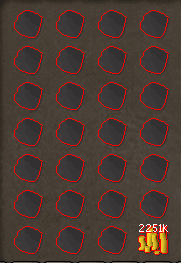
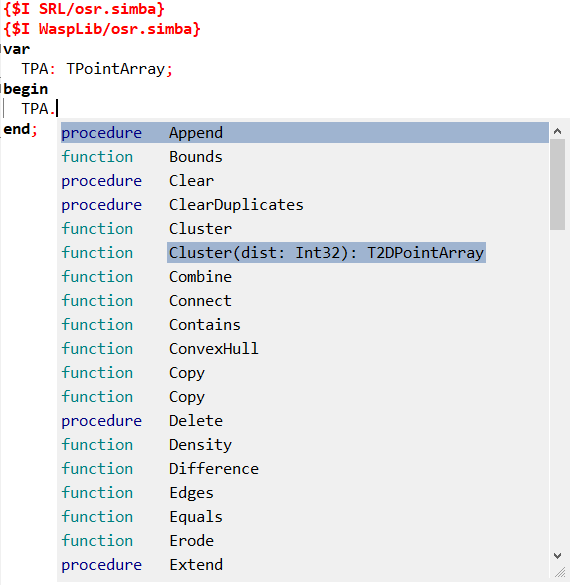
TPAs have several built in functions which you can see easily with Simba’s auto-complition (CTRL+SPACE) or be searching TPointArray. in the function list:
Now for this tutorial, I want to teach you guys about ATPAs and how can they br useful so we are going to turn this TPA we have into an ATPA.
First of all, ATPA stands for ""Array of TPointArray"". So it’s an array of arrays. It can often be called a 2D array (2 dimensional array). So imagine something like this:
[
  [
    [0,0], [1,1], [2,2]
  ],
  [
    [5,5], [6,6]
  ]
]
I’ve indented it so you can hopefully see it better. That would be an ATPA.
Now let’s go back to our TPA.
Our TPA currently holds the coordinates of all the item borders found by Simba, lets say we want to separate each border, we want to separate them into an ATPA where each TPA holds a single item border.
Luckily, this is very easy to do with SRL built-in functions like TPointArray.Cluster():
var
  ATPA: T2DPointArray;
  TPA: TPointArray;
begin
  SRL.FindColors(TPA, RS_ITEM_BORDER, Inventory.Bounds);
  ATPA := TPA.Cluster(3); //cluster every TPA within 3 pixels of each other.
  Debug(ATPA);
end;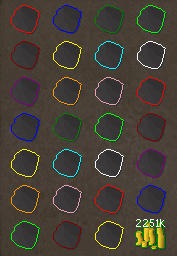
We could now easily select a single TPA out of our ATPA, for example:
var
  ATPA: T2DPointArray;
  TPA: TPointArray;
begin
  SRL.FindColors(TPA, RS_ITEM_BORDER, Inventory.Bounds);
  ATPA := TPA.Cluster(3); //cluster every TPA within 3 pixels of each other.
  Debug(ATPA[0]);
end;
You might also want to look at some other functions like sorting, since you don’t always get things in the order you want but that will be your homework :)
And that’s if for this tutorial, I hope you found it interesting and understand the power of TPoints!