There’s 2 types of tools you will be using while developing scripts:
- Simba built-in tools
- Script tools
Script tools
This guide is not focused on this because their uses vary a lot to cover in a guide so I’m just going to explain what they are and where you can find them.
Script tools are tools that are actually a Simba script. It’s a simba file you open and run and their purpose is to be used as a tool to aid you. Because these are just scripts, their uses can vary too much to cover, the limit is literally people’s imagination.
In case of WaspLib tools, they can be found in the following directory:
Simba/Includes/WaspLib/toolsBuilt-in tools
Now for built-in tools which is the purpose of this guide, you can find them in the tools section of the window menu:
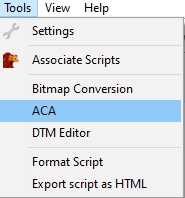
The one you will likely use the most is ACA but I’m going to talk about all of them a little.
Bitmap Conversion
Bitmap conversion is used to convert bitmaps (images) to strings.
In Simba you can use bitmaps as files or as strings.
I’ve actually never had to use this tool because I’ve always used files instead but if you ever want to include an image file in your script, this is the tool you use.
I’m actually not sure if it can handle any image file format or only .bmp but since most images in SRL are actually.png I would assume it doesn’t matter.
Anyway, when you have a bitmap as a string you can store it in a string variable:
var
  YellowClickBitmapString: String :=  'meJxjZGBgBKP/DP+xIkaYAiCCiGFVjCwLZ2MqxpTCqhiXCWjieCxCU4xHGVbF+AOEDAOJcSQeHxEZSsSHPEmxSWQKAQAWmB8k';
And you can convert it from a string into a bitmap for Simba to use with the functions BitmapFromString:
var
  Bitmap: Int64; //Bitmaps are Integers or TMufasaBitmaps, more on that last one later.
  YellowClickBitmapString: String :=  'meJxjZGBgBKP/DP+xIkaYAiCCiGFVjCwLZ2MqxpTCqhiXCWjieCxCU4xHGVbF+AOEDAOJcSQeHxEZSsSHPEmxSWQKAQAWmB8k';

begin
  Bitmap := BitmapFromString(14, 14, YellowClickBitmapString); // 14, 14 is the width and height of the bitmap.
end.
As a side note, since we are talking about bitmaps, if you ever want to import a bitmap from a file:
var
  Bitmap: Int64;

begin
  Bitmap := LoadBitmap('bitmap_path');
end.
It’s a good practice to always free bitmaps once you are done using them, otherwise you might get memory leaks and this goes for both bitmaps as string and files.
var
  Bitmap: Int64;

begin
  Bitmap := LoadBitmap('path to your bitmap');
  //Use your bitmap...
  FreeBitmap(Bitmap);
end.
If you want to use your bitmap several times before freeing it you can also add it on terminate:
var
  Bitmap: Int64;

procedure FreeBMP;
begin
  FreeBitmap(Bitmap);
end;

begin
  Bitmap := LoadBitmap('path to your bitmap');
  //Use your bitmap...
  AddOnTerminate(@FreeBMP);
end.
AddOnTerminate Makes Simba run whatever you tell it to when the script is terminating.
DTM Editor
Now let’s talk about the DTM Editor. To be honest, nowadays I personally don’t use it very much, but DTMs are really awesome IMO. DTM stands for Deformable Template Model.
It’s basically a list of coordinates of points in relation to one main point and their respective colors.
They are accurate and fast to detect,the downside of DTMs is that they are quite laborious to make, specially when you need to make a lot of them and in most cases the speed benefit compared to a bitmap is insignificant.
Anyway, make sure you have Simba focusing the game client and launch the DTM Editor:
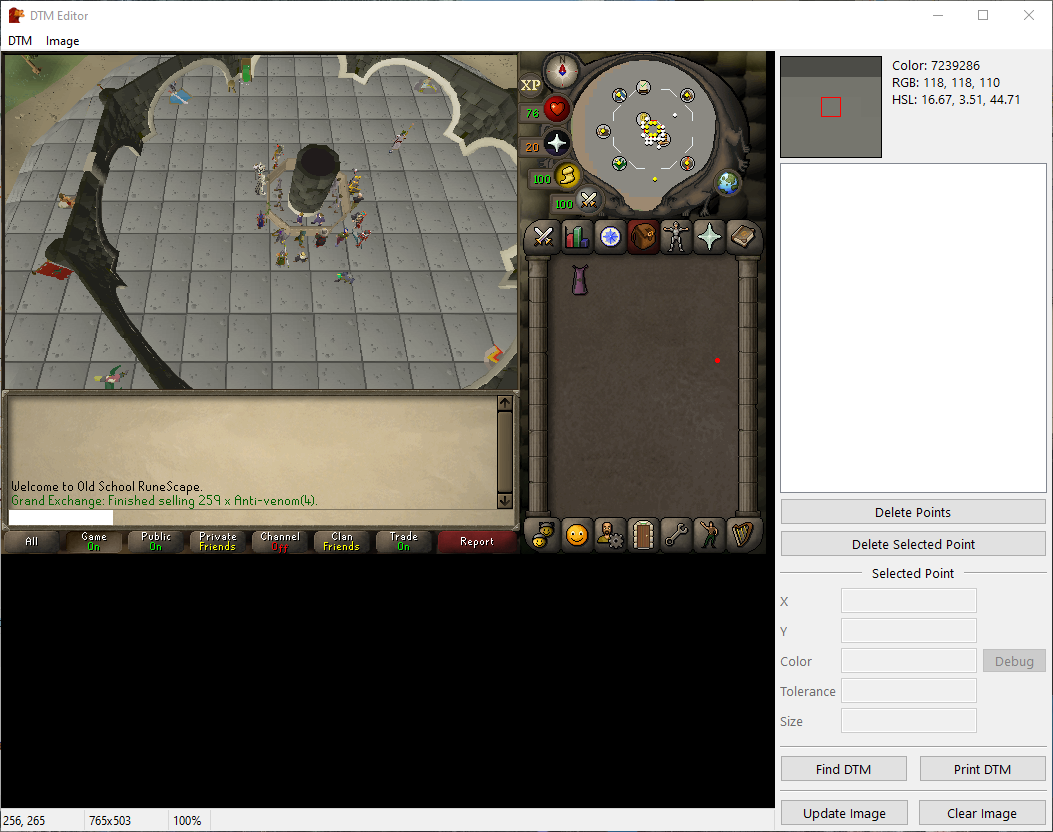
Same as bitmaps, you usually want to do one of something that doesn’t change. Items are a good example of this. As an example, we are going to make a DTM of my thieving cape.
Before we begin, you can zoom in and out the DTM Editor by pressing CTRL and Scroll in/out. First we zoom in and then we choose a starting point of the item. I usually like to start in the outline but it shouldn’t matter much unless for most items:
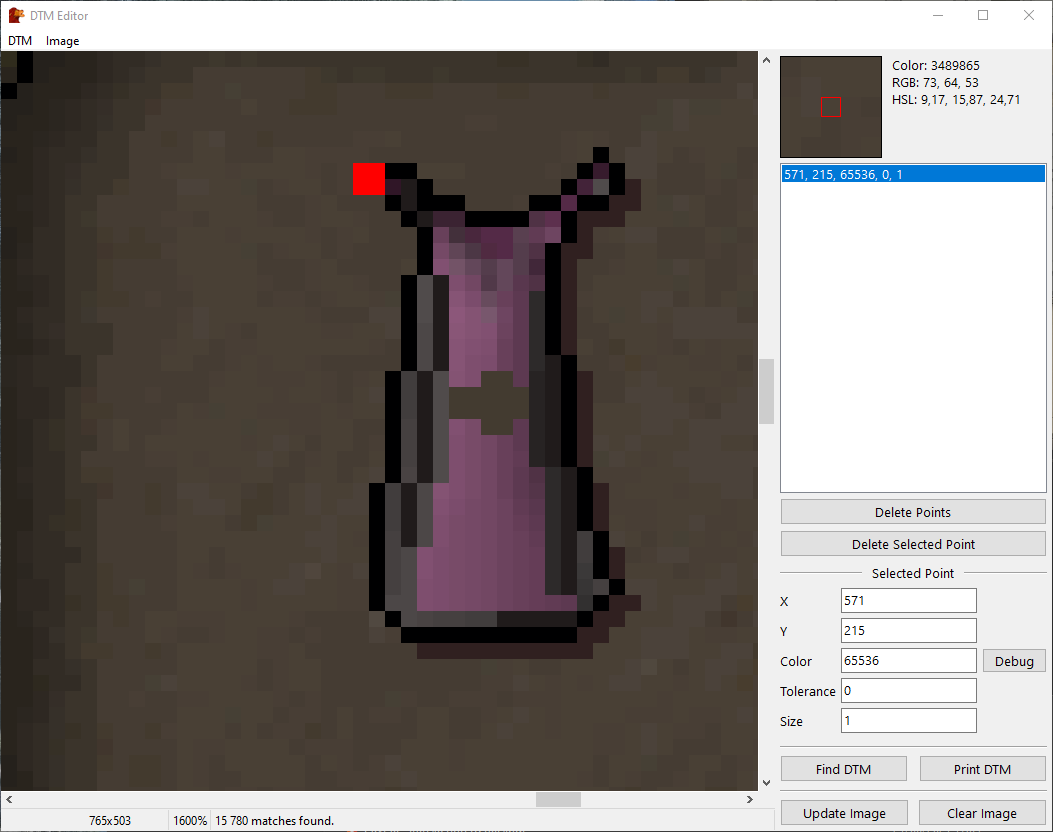
That will be the main point of our DTM Now start picking random points inside the item, get a little bit of the outline, never outside, and inside:
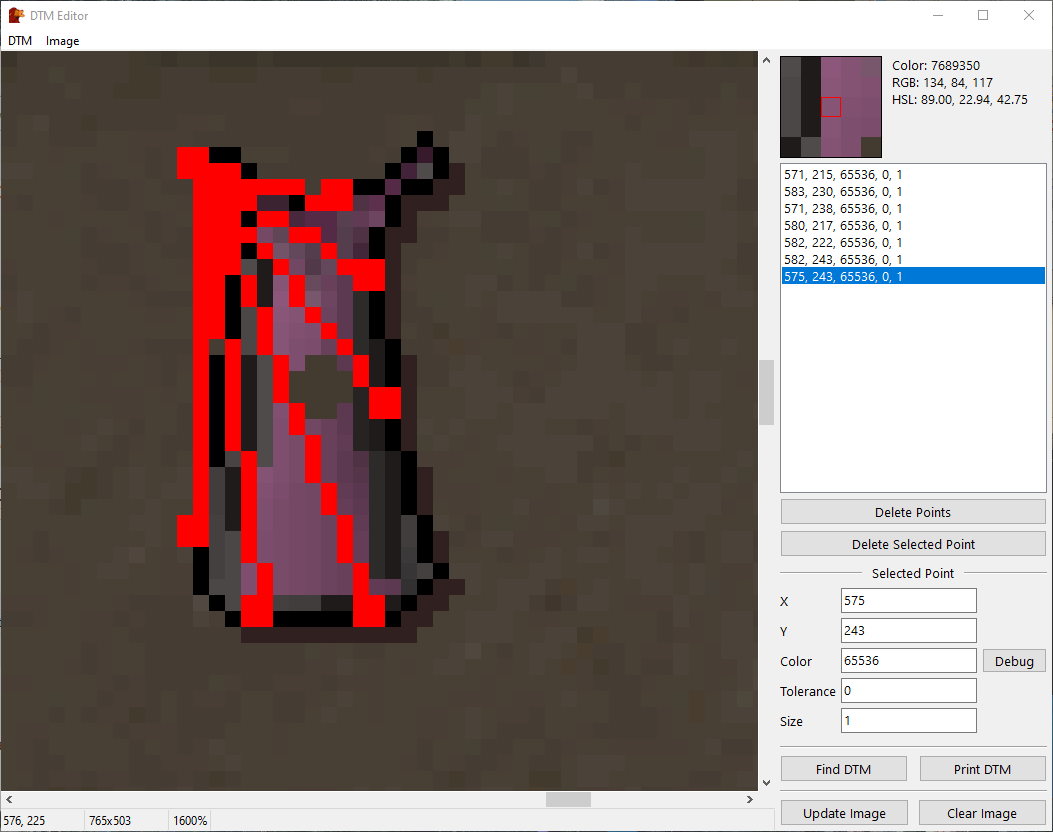
Once you are happy with your result you can debug it with the Find DTM button:

You should also try to debug it with similar items too to be sure you made a proper DTM and not one that is too general unless that’s what you are looking for.
For example, if I were to do a DTM only of the outline:
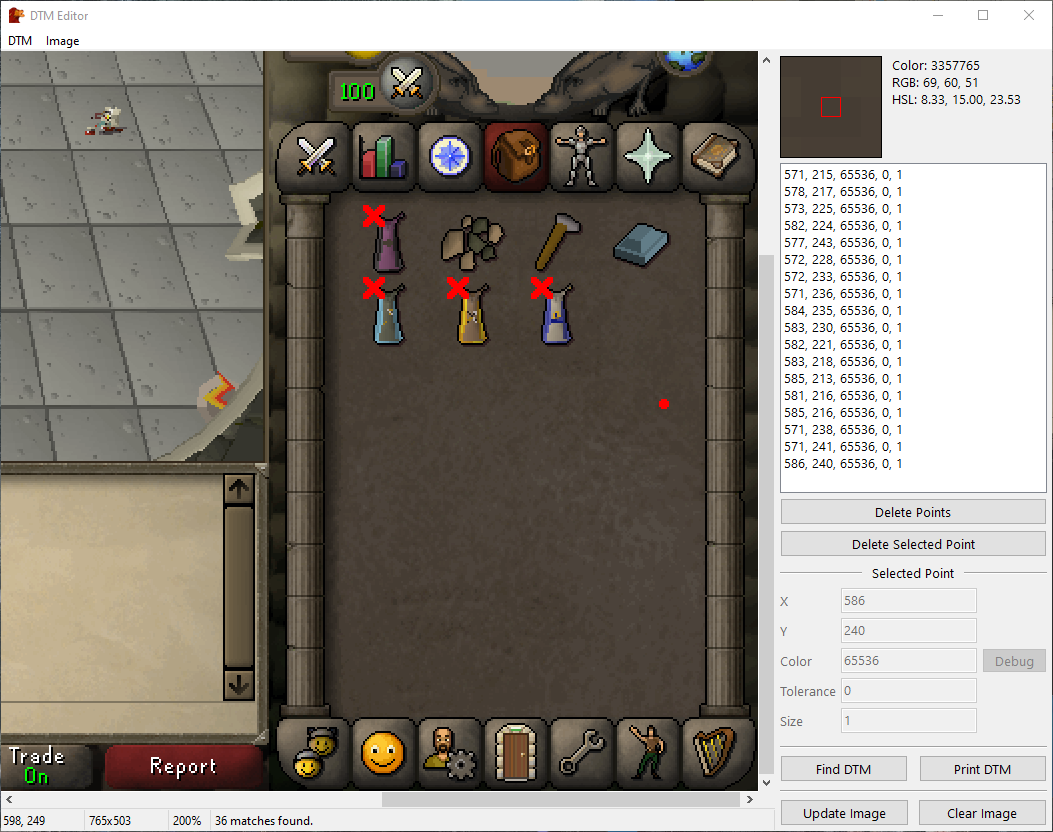
All skill capes get picked up. That’s okay if that’s what you want, but if you want to specifically target one thing you should try to get points that unique to it and the result should be this:
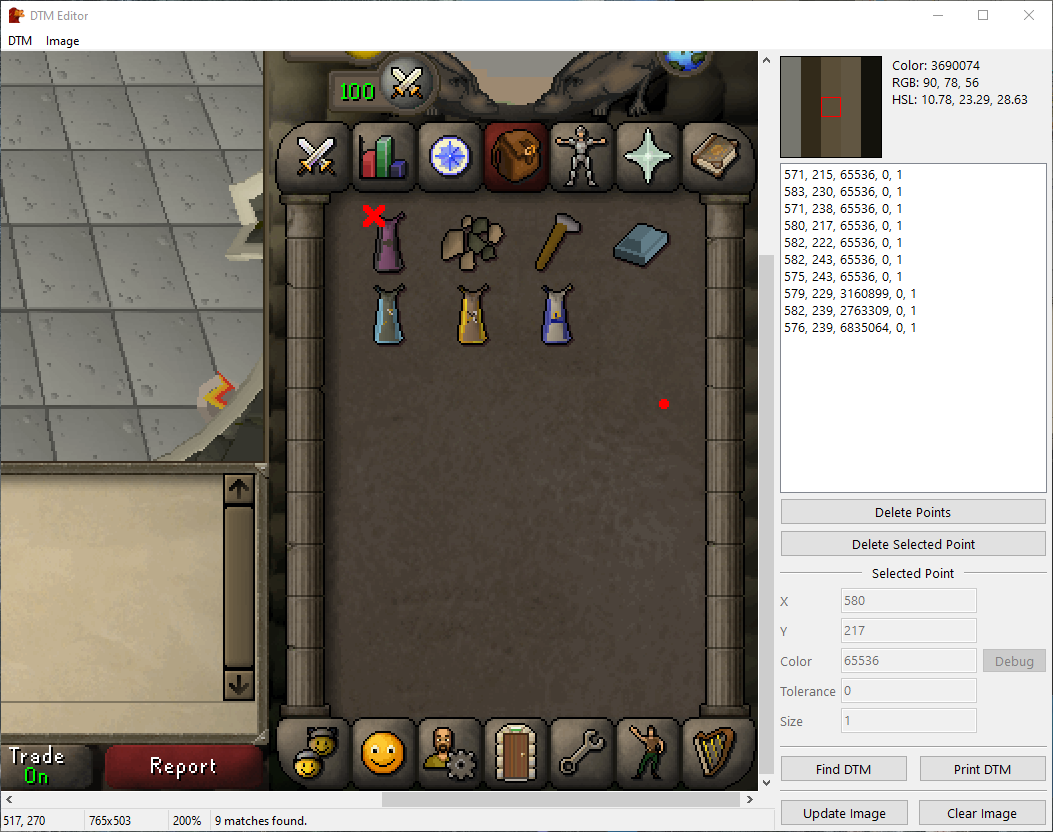
Anyway, when you are happy with your DTM you can click the Print DTM button and you will get something like this in Simba’s Output:
DTM := DTMFromString('mKgEAAHic42NgYJjGBMGTgbgfiOcC8RQg7oWy5wHxTCCeAcQTgXg6EM8B4lmMDAx9QNzDCGHPBeLlQLwYiJcC8XwgngLE/VA+SHwhELsEeTPsXpsEtJkRL64tcWTwjgpicAv1ZTC0MWUgF+C3BTdGBQC+VRdu');This can be used as is in your script but it’s usually a good idea to rename it to something that makes sense, specially if you are using a lot of DTMs:
var
  AntiVenom4DTM: Int64 := DTMFromString('mKgEAAHic42NgYJjGBMGTgbgfiOcC8RQg7oWy5wHxTCCeAcQTgXg6EM8B4lmMDAx9QNzDCGHPBeLlQLwYiJcC8XwgngLE/VA+SHwhELsEeTPsXpsEtJkRL64tcWTwjgpicAv1ZTC0MWUgF+C3BTdGBQC+VRdu'); //DTMs are also integers, same as bitmaps.

begin
//Use your DTM.
FreeDTM(AntiVenom4DTM); //DTMs should also be freed when not needed anymore.
end.
I’ll explain at a later point how to use bitmaps and DTMs but you can search for those terms in the Function List and see what functions are available and try to figure it out yourself too :slight_smile:
Bitmaps and DTMs should only be used for static things, items, buttons, etc should be okay, but most things in the mainscreen don’t work well with bitmaps and DTMs because it’s hard to find an exact match. There’s too many possible camera angles and lights and shadows for both to work properly with stuff on the mainscreen.
ACA
So now I’m going to introduce you to ACA (Auto color aid)!
ACA stands for Auto Color Aid and it’s something you’ll likely be using a lot.
ACA builds what we call ColorToleranceSpeedColors. Usually refered to as CTS. Anyway, there’s 3 types of CTS:
CTS0 CTS1 CTS2
This are just records that have some variables related to colors.
type
  TCTS0Color = record
    Color: Int32;
    Tolerance: Int32;
  end;

  TCTS1Color = type TCTS0Color;

  TCTS2Color = record
    Color: Int32;
    Tolerance: Int32;
    HueMod: Extended;
    SatMod: Extended;
  end;
CTS0 is the fastest one while CTS2 is the slowest. However, CTS2 is the most accurate while CTS0 is the least accurate.
Anyway, let’s open ACA:
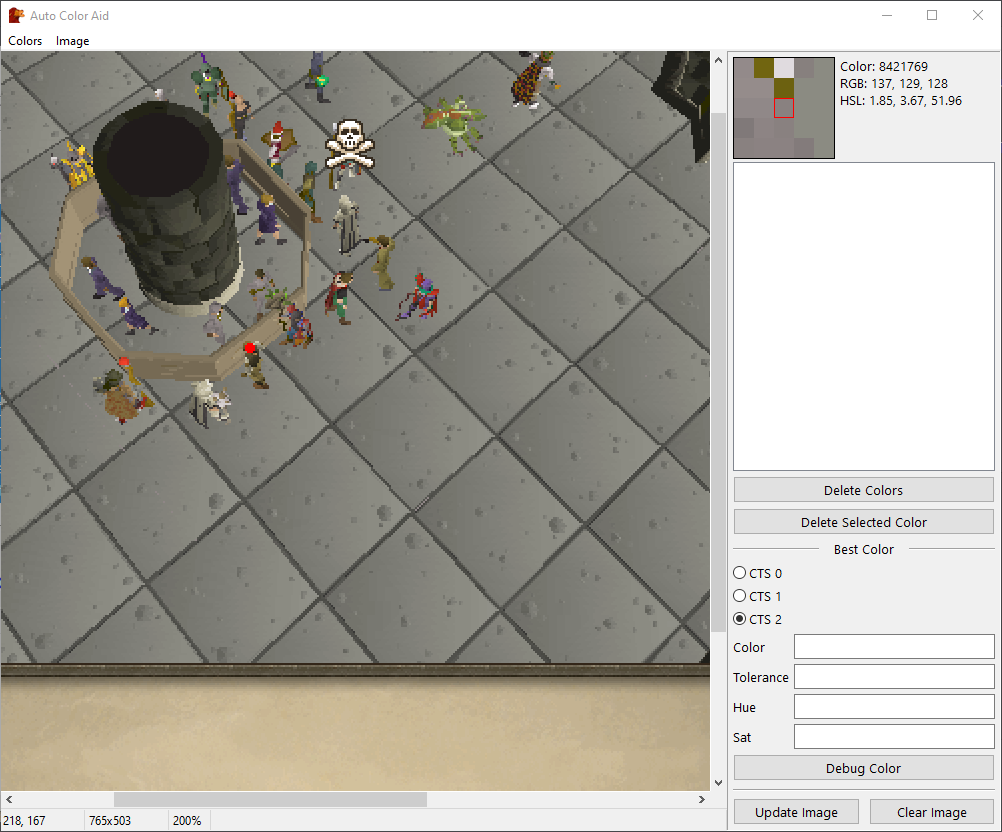
Again, like the DTM Editor, you can zoom in and out with CTRL + Scroll.
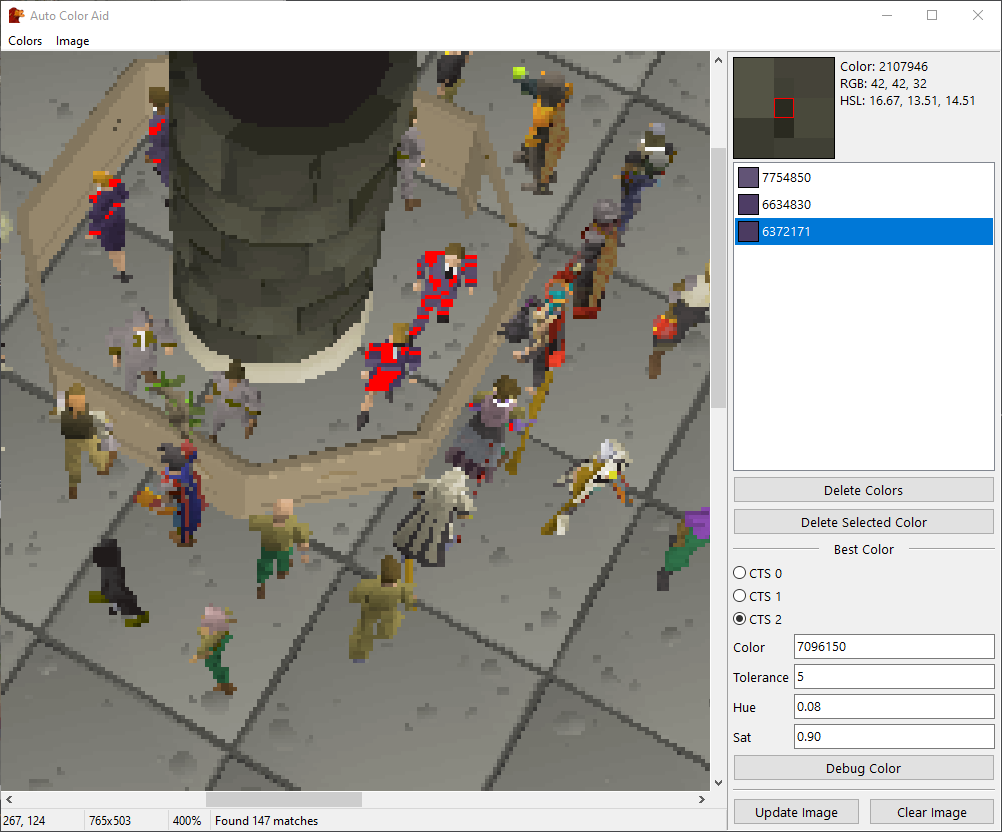
Let’s say we want to build a CTS for the GE Clerks (the purple guys).
Click on some colors that are unique to them.
You should try to get colors that unique to whatever you want to find.
You should also try to get colors that are close to each other in the color scheme so the CTS built doesn’t pick up everything in the mainscreen. With close in the color scheme I mean for example, not picking white and black. you can pick white, with light colors or black with dark colors. Either way you can try it and see what happens!
Here I picked some of the purple:
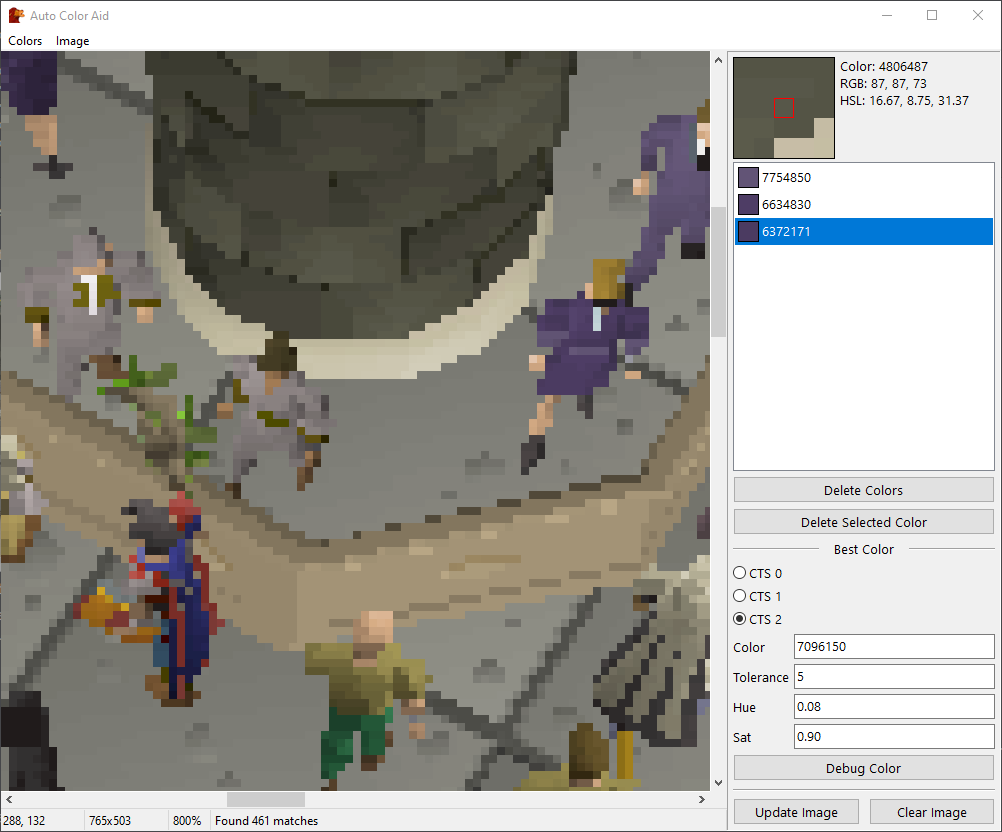
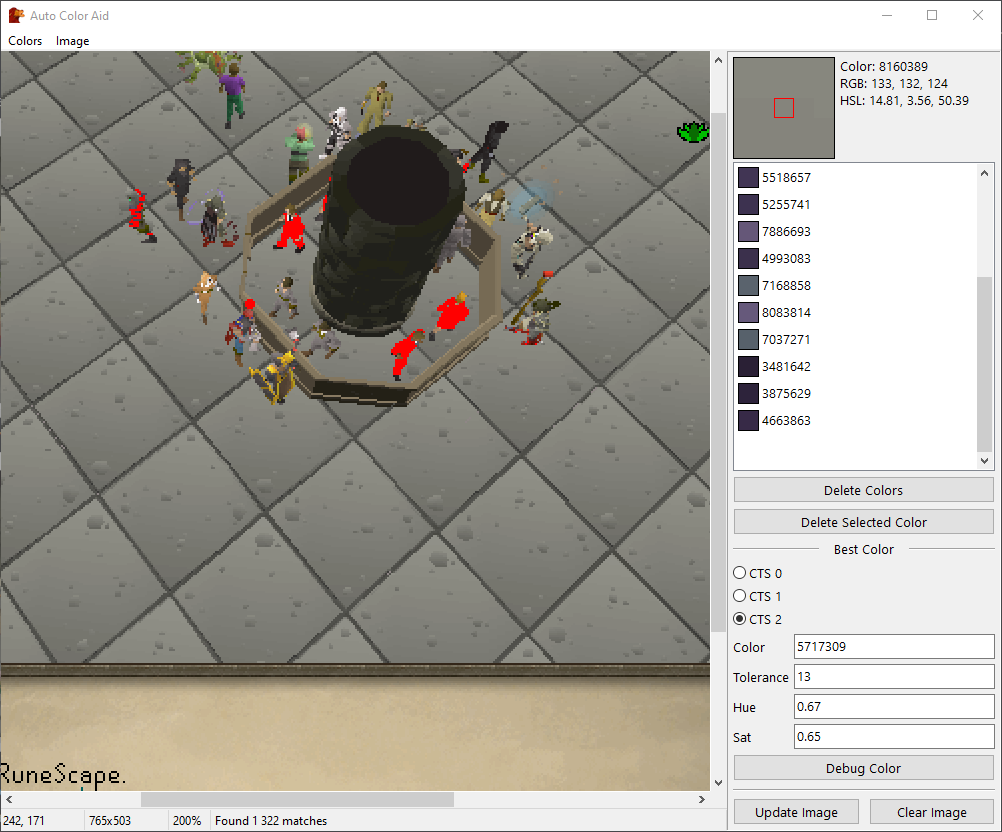
To see how the CTS you are building does at detecting whatever you want click the debug button:
That’s a good start but it’s not good enough. You should also rotate the screen and see how it looks from several angles. You can update the image with the respective button in ACA. This for example, looks pretty good:
If you pick too many colors, specially the ones that are far apart you get something like this:
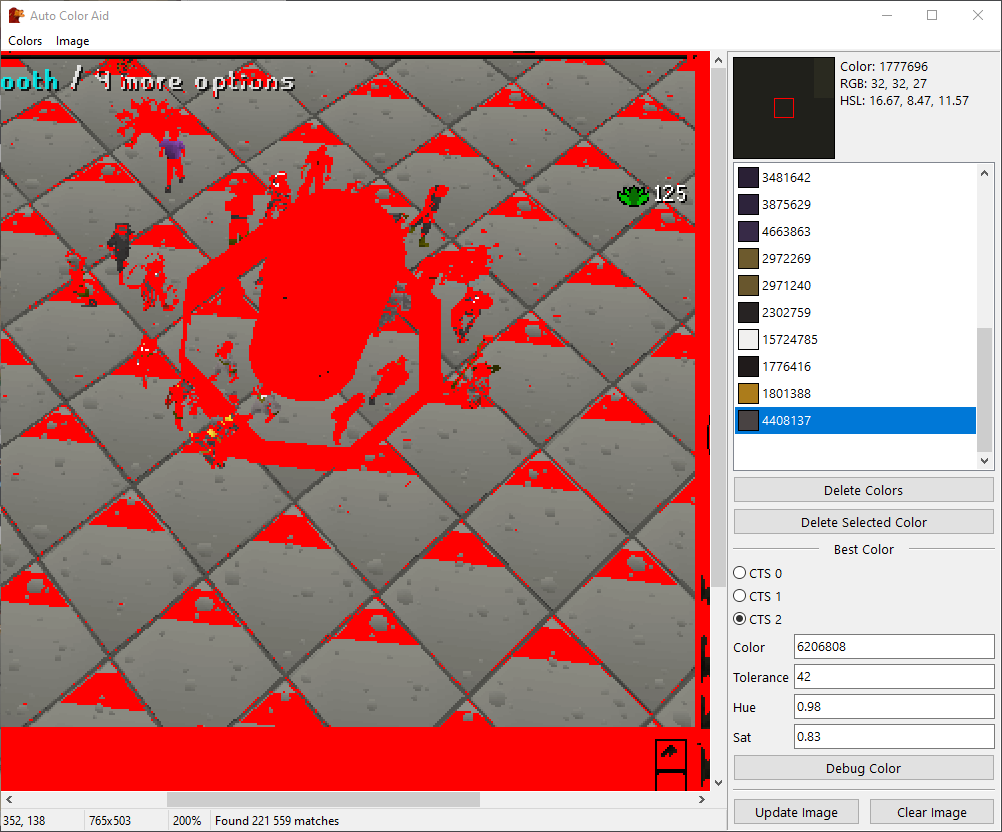
This were colors only picked from the clerks but as you can see, this is already picking up too much useless stuff. You can also change the CTS type in ACA and debug it to see how it affects things. If CTS0 does the job for what you want, you should go with that, but in reality you will likely use CTS2 most of the times and even though CTS0 is faster it’s not really noticeable for a human.
Anyway, when you have your CTS properly designed like this one, you can click simply CTRL+C with the ACA window on focus and it will automatically copy you the CTS color which looks something like this:
CTS2(5717309, 13, 0.67, 0.65)This can later be used to find colors. It’s not really the purpose of this tutorial but just so you can see something working you can try this simple script with your own CTS color:
{$I SRL/osr.simba}
var
  GEClerk: TCTS2Color;
  TPA: TPointArray;   //Array of TPoints, a TPoint is basically a X, Y coodinate.

begin
  GEClerk := CTS2(5717309, 13, 0.67, 0.65); //There's no need to store this in a variable, but you can if you want to.

  SRL.FindColors(TPA, GEClerk, MainScreen.Bounds);
  (*
    SRL.FindColors takes in a TPointArray to which it will add
    the TPoints the color was found at.

    It takes in the color, in this case we are passing it
    GEClerk variable but you could pass CTS2(5717309, 13, 0.67, 0.65)
    directly.

    And then it needs a TBox. A TBox is litteraly a box area with 4 corners.
    Because we want to search the MainScreen we pass it MainScreen.Bounds.
    You could also just pass it a TBox of your own with 4 coordinates for example:
    [0, 0, 200, 200] each field being X1, Y1, X2, Y2 in that order.
  *)


  Mouse.Move(TPA); //Move the mouse to a random point in the TPA.
  if MainScreen.IsUpText('Clerk') then //Check if the uptext matches what we want
    Mouse.Click(MOUSE_LEFT); //Click it!
end.
And that’s it for this tutorial